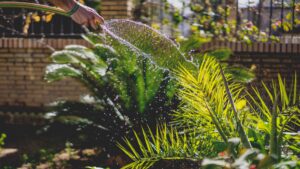
If you love spending time outside your home, you will find having one or more outdoor faucets really handy. With an outdoor faucet, you will have an easier and quicker time watering your garden. It will also be highly useful whenever you cook outside and clean your outdoor space.
Placing an outside tap is something you can do as a DIY project. If you want to know how to install an outdoor faucet, Tureks Plumbing Services provides the steps and tips you need to follow (take note that if any part of the process becomes too challenging, or if you don’t have the time or skills to do it, don’t hesitate to call in the professionals — they’ll be happy to get the job done for you).
- Choose the location of your tap. Start by looking in your basement or crawl space for an area near a pipe where you can install your faucet. If there is no cold water line near the location where you’d like to install the faucet, you’ll have to run the pipe to a water supply line elsewhere.
- Select your pipe. For an underground pipeline, plumbers recommend using PEX tubing. This is because PEX tubing is easier to install and cheaper than copper pipe. You can also make a continuous run from your house and make turns without installing a single fitting when you choose this type of pipe. However, if you choose this material, be prepared to buy a PEX crimping tool as well.
- Prepare to dig a trench. In case you will have to run a pipe underground, call 811 several days before you dig so that a utility company can locate buried pipes and cables in your yard. Once you’re given the go-signal, dig your trench. A plumber in Appleton, Wisconsin says that you only need to bury the water line about six inches deep.
- Protect the water line. Once you’re done placing the pipe underground, cover the tubing with at least two inches of soil and pour in about two inches of dry concrete mix before backfilling the trench. This will protect the water line from shovel attacks or any external force.
- Install the post and faucet. You can use a hollow PVC fence post or any material you have or want to use as the post for your faucet. Run the PEX run inside the post to protect it from sunlight since UV rays can reduce its life. Set the post at least 18 inches deep. Screw the sillcock flange to the post; make sure it is tight and secure. Afterward, install a screw-on backflow preventer.
If you will be installing the faucet on a wall, follow the steps below:
- After choosing the location for your outdoor faucet, drill a hole through the wall. Once you’ve chosen the right water supply pipe for your outdoor faucet, clean the pipe and turn off the water.
- Cut through the current pipe and solder the old pipe together with the new line. Run the pipes all the way up to the spot where you will install the faucet in the wall.
- Install the faucet using plumber’s putty around the back of the faucet piece. Next, insert the faucet into the hole from the outside of the house. Push the faucet against the wall of the house so that the plumber’s putty squeezes out and spreads through the sides of the faucet. Wipe off any excess putty that squeezes around the edges of the faucet
- Lastly, connect the faucet piece to the pipe inside the house. Solder these two parts so that they are completely connected and secure as well.